Friday, December 18, 2015

My Crochet Gifts 2015

So I said this year I wasn't going to get carried away with crochet gifts. They take forever and to be honest, I'm not always sure how appreciated they are. Of course everyone says thank you with a smile but are they just being polite? Do people really want my homemade stuff? Cut to November and I have a list of holiday requests! The holidays are usually when I get the most creative and try new patterns I've never attempted. The extreme time crunch certainly adds to the excitement as well! As always, I will include the pattern sources. That way, if you see something you like, you can make your own. Here we go...

Sea Flower Shawl- Rustic Modern Crochet by Yumiko Alexander

Crochet Christmas Gifts by Over The Apple Tree

Crochet Christmas Gifts by Over The Apple Tree

Crochet Christmas Gifts by Over The Apple Tree


Ninja Turtle Hat- Jaime George

Crochet Christmas Gifts by Over The Apple Tree


Fox Scarf(paid pattern)- We-R-Soto Design
I altered the pattern a bit to make this one child size.

Crochet Christmas Gifts by Over The Apple Tree

Crochet Christmas Gifts by Over The Apple Tree


Stampy Hat- See my blog post for chart

Crochet Christmas Gifts by Over The Apple Tree


Toothless, How To Train Your Dragon- Nichole's Nerdy Knots
See more of my photos of this project which was actually for a birthday present but is so close to Christmas I'm gonna list it anyway!

Crochet Christmas Gifts by Over The Apple Tree


Ballerina Elephant, Edwards Menagerie
If you're curious how I added the tutu, see my notes in my Ravelry project page
This is my second Edwards Menagerie project. See my bunny here

Crochet Christmas Gifts by Over The Apple TreeCrochet Christmas Gifts by Over The Apple Tree

Crochet Gifts 2015 by Over The Apple Tree


V-Stitch Beanie- Over The Apple Tree free pattern

Crochet Christmas Gifts by Over The Apple Tree


ZiggyZag Vixen Slouch- Faith Holbrook on Ravelry

Crochet Christmas Gifts by Over The Apple Tree

Crochet Christmas Gifts by Over The Apple Tree


This is my third year of crochet Christmas projects. Check out years past 2013 and 2014


I will be sharing with these great blogs!


Follow me here:

Saturday, December 12, 2015

Crochet Like Crazy- Toothless

This time of year I'm always super busy because I make several of my holiday gifts. All my children's birthdays are also around this time. My daughter is crazy for the How To Train Your Dragon movie so I decided to crochet her Toothless for her birthday! This pattern is from Nichole's Nerdy Knots. She's in love with her new dragon!

**This pattern has been taken down from Ravelry but can still be found on Instructables

Crochet Toothless from How To Train Your Dragon, Over The Apple Tree

Crochet Toothless from How To Train Your Dragon, Over The Apple Tree

Crochet Toothless from How To Train Your Dragon, Over The Apple Tree

Crochet Toothless from How To Train Your Dragon, Over The Apple Tree

Crochet Toothless from How To Train Your Dragon, Over The Apple Tree

Crochet Toothless from How To Train Your Dragon, Over The Apple Tree

Crochet Toothless from How To Train Your Dragon, Over The Apple Tree

Crochet Toothless from How To Train Your Dragon, Over The Apple Tree

Crochet Toothless from How To Train Your Dragon, Over The Apple Tree

Crochet Toothless from How To Train Your Dragon, Over The Apple Tree


Follow me here:

Tuesday, December 1, 2015

Minecraft Stampylongnose Hat

If you have a kid who plays video games, you've probably heard of Minecraft. I got a Christmas request for a Stampy hat from my niece. As far as I can tell, there isn't a pattern for this. Mine was inspired by a photo that my niece sent me from a Google search.

Crochet Minecraft Stampy Hat, Over The Apple Tree

This is NOT a detailed pattern and instructions because frankly, it was pretty tricky to figure out. I was more wrapped up in what I was doing than taking pictures and writing down details. Now that I'm done, I'm not interested in doing it again just for instructional purposes. Sorry, your on your own!

I will share my graph and what tips I can without confusing you too much. If you're an experienced crocheter, you can figure this out. The trickiest part is changing colors and adding on to the rows.

First of all, make an orange hat. I chose to do a basic double crochet earflap hat.

The Stampy face is worked with worsted weight yarn. White, dark grey, light grey, black, and green. In this graph image, the light grey on the outer edges is just dead space. The only place I used light grey yarn was for the nose(totally optional, you could just use the dark grey for the nose). This face is worked in HDC with a 4.25 mm hook.

Crochet Minecraft Stampy Hat, Over The Apple Tree

Start at the bottom of the image. Ch 11 then starting in the second ch from hook, hdc across(10). At the end of each row, ch 1 and turn. Decide which side is the front and which is the back. You can stick in a stitch marker or a safety pin to mark which side is which.

In some places I carried the yarn if it made sense. Other places I cut and refastened. Take your time before you cut your yarn. Look to the next row and plan ahead. If you don't cut your yarn, be sure to pull your yarn you aren't using to the back side. This way it won't show when you pick it back up on the next row.

Everything is worked in hdc's except for the last dark grey sections of the outer eyebrows. I added that part after I was done. I worked two rows of 3 sc vertically along the edge of the white.

Crochet Minecraft Stampy Hat, Over The Apple Tree

Crochet Minecraft Stampy Hat, Over The Apple Tree

Crochet Minecraft Stampy Hat, Over The Apple Tree

**If you make this hat to sell, please be courteous and give credit to me as the designer with a link back to me. Do not copy and post this pattern or claim it as your own. Do not try to sell this pattern. Do not re-publish photos as your own.

Ears
Make 4
use same size hook as hat
Ch 2
1. 2 sc in 2nd ch from hook. Ch 1 turn
2. 2 sc in each stitch. Ch 1 turn (4)
3. sc in each across, ch1 turn (4)
4. 2sc in first st, sc in next 2 st, 2 sc in last, ch1 turn (6)
5. sc in each across, ch1 turn (6)
6. 2sc in first st, sc in next 4, 2sc in last, ch1 turn. (8)
7. sc in each across (8)

Each ear is two pieces attached together with sc around top edges. Sew onto head with yarn needle.

Good luck to you!

I will be sharing with these great blogs!

Thinking about opening and Etsy shop?

Use this link and earn 40 free listings!

I'm not making this hat for my Etsy store but feel free to stop by and see my other creations.


Follow me here:

Thursday, November 19, 2015

V-Stitch Winter Beanie

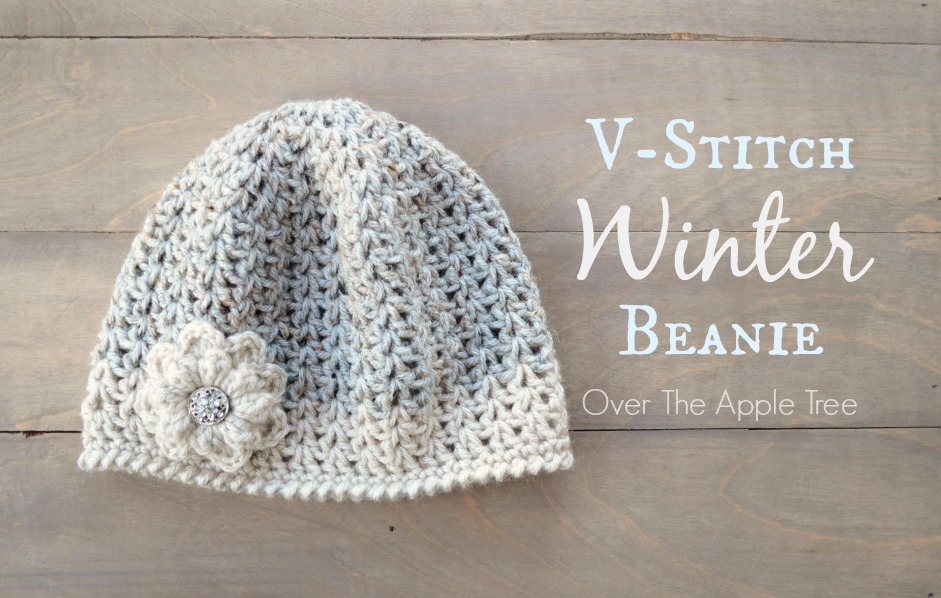
I have been searching for this pattern for at least a year! After seeing a photo of a certain grey and black hat online, I set out to find a similar pattern. If there's one out there already, I could not find it and neither could anyone else as far as I can tell.

V-stitch Winter Beanie, free pattern, Over The Apple Tree

You may recognize this grey and black beanie from Pinterest. It's been linked to a crochet website saying there's a free pattern. The hat is not on that website, it's actually for sale at Nirvanna Designs as a finished product. The Nirvanna Designs products are beautiful and their company has a great story. If you can't crochet this yourself, or you want to check out some beautiful knit and crochet pieces, visit their website. Even though their products look to be beautiful and quality items, I can't quite bring myself to buy something that I could make myself.

Do you like this hat from Nirvanna Designs? Check out my free pattern inspired by this popular hat. Over The Apple Tree

There are a billion V-stitch hat patterns available but none of them had the same look. There was a blizzard here in Colorado this week, so I sat myself down on our snow day and decided I was going to figure this out once and for all. I think I've gotten pretty close! My hat is worked with a no-space double crochet V-stitch. Instead of the regular V-stitch where you would work (dc,ch1,dc) in the same stitch, this is just 2 dc's in the same stitch. Easy and less lacy look. You could even add a fleece lining to make it warmer!

Here's how I made my hat...
-Vanna's choice yarn(worsted weight) top of hat Grey Marble, bottom and flower Linen
-Hook 5mm
-Hat sized for an adult woman. You could add or remove rows to make it longer or shorter. If you want a smaller size for a child, you can do less increase rows.

V-stitch= 2 dc's in same space. V's are worked in the space between dc's, not the tops of the stitches
**Join at end of each row= join with sl st to 3rd ch, sl st into space before 1st dc from previous row

Click on photos to see full size

1. Magic Ring, ch 2, 9 dc's in ring. Join with sl st in space between chain and 1st dc
* in the photo I do 10 dc's in the ring. I've changed the pattern to 9 dc's so now there won't be an extra space. The last V of row 2 will be worked in the space between the chain and last dc of first row.

V-stitch Winter Beanie, free pattern, Over The Apple Tree

2. Ch 3, Dc in same space as join(this forms the first V), 2 dc's(V-stitch) in each space between dc's from 1st row. Join(see** above) (10 V's)


V-stitch Winter Beanie, free pattern, Over The Apple Tree

V-stitch Winter Beanie, free pattern, Over The Apple Tree

V-stitch Winter Beanie, free pattern, Over The Apple Tree

3. Ch 3. Dc in same space(1st V) Make the next V-stitch in the center of the next V from previous row, V-stitch in the space before the next V from previous row, *(V-stitch in the next 2 V's from previous row, V-stitch in space before the next V from previous row) Repeat from * to end of row. Join. (15 V's)


V-stitch Winter Beanie, free pattern, Over The Apple Tree

V-stitch Winter Beanie, free pattern, Over The Apple Tree

4. Ch 3. Dc in same space(1st V) Make the next 2 V's in the center of the next 2 V's from previous row, V-stitch in the space before the next V from previous row, *(V-stitch in the next 3 V's from previous row, V-stitch in space before the next V from previous row) Repeat from * to end of row. Join. (20 V's)

5. Ch 3. Dc in same space(1st V) Make the next 3 V's in the center of the next 3 V's from previous row, V-stitch in the space before the next V from previous row, *(V-stitch in the next 4 V's from previous row, V-stitch in space before the next V from previous row) Repeat from * to end of row. Join. (25 V's)

6. Ch 3. Dc in same space(1st V) Make the next 4 V's in the center of the next 4 V's from previous row, V-stitch in the space before the next V from previous row, *(V-stitch in the next 5 V's from previous row, V-stitch in space before the next V from previous row) Repeat from * to end of row. Join. (30 V's) This is the end of the increase rows

7-13. Ch 3, dc in same space, V-stitch in each V from previous row. (30V's)

Change color and join

14-16. Work V's same as row 7

17. Ch 1, Sc across top of V's. Make sure they are not too tight

18. Crab stitch around. Crab stitch is a sc worked in the reverse direction. Instead of crocheting right to left, you go to the right. Here's a video tutorial I found if you need help.

V-stitch Winter Beanie, free pattern, Over The Apple Tree

If you look at the website of the original hat, the purple hat has a sc row(row 17) but the other colors go straight to the crab stitch in row 18. It's up to you how you want to finish your hat.

Flower
I'm not ambitious enough to come up with my own pattern for a flower. I used the Autumn Berry Flower pattern from Jenny Dickens and added a jeweled button.

If my hat doesn't look exactly like the original, it's because I made it from looking at a photo. I don't have the actual black and grey hat in my possession. The original hat for sale also says it is lined with fleece, mine is not. This is why you can see the open space between the stitches of my hat.

Favorite this pattern on Ravelry


If you make this hat to sell, please be courteous and give credit to me as the designer with a link back to this blog post. Do not copy and post this pattern or claim it as your own. Do not try to sell this pattern. Do not re-publish photos as your own.

Thinking about opening an Etsy shop?
Use this link and earn 40 free listings!

V-stitch Winter Beanie, free pattern, Over The Apple Tree

V-stitch Winter Beanie, free pattern, Over The Apple Tree

V-stitch Winter Beanie, free pattern, Over The Apple Tree


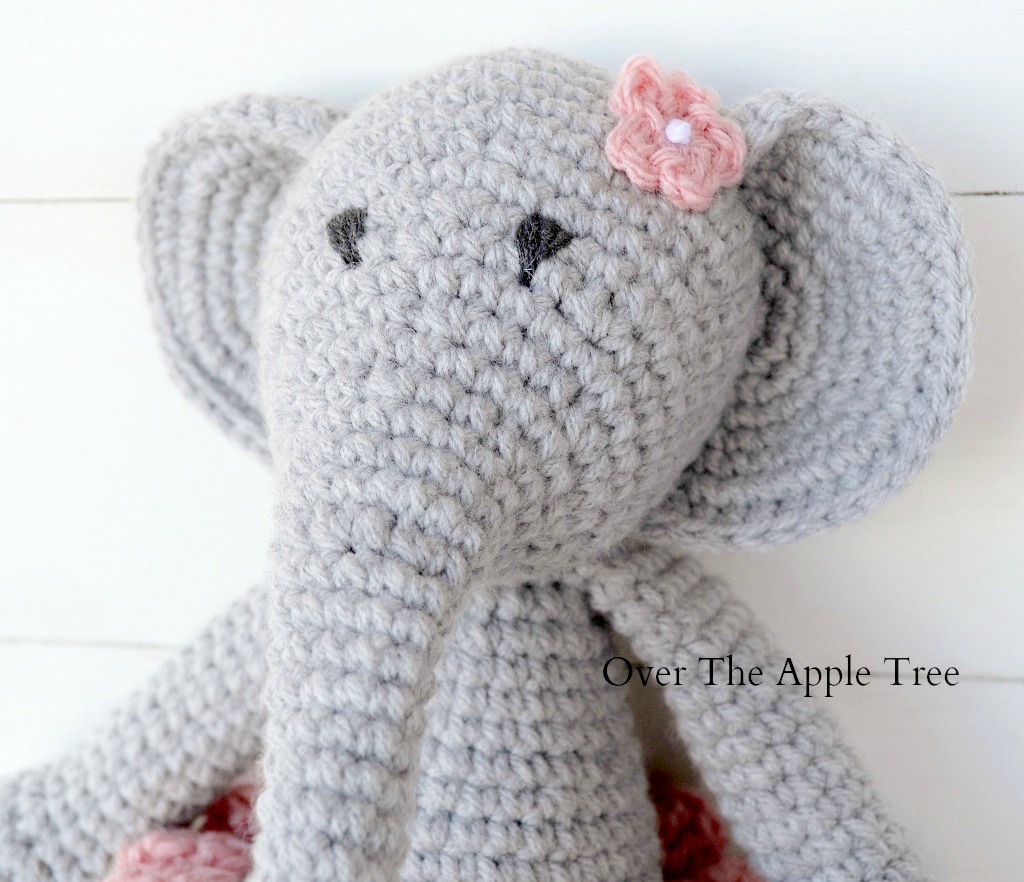
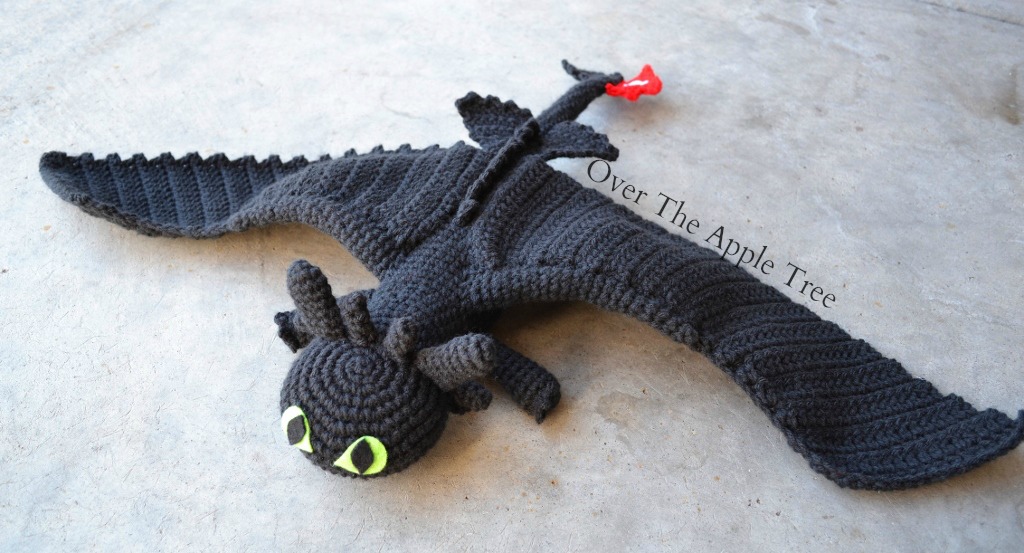
Want to check out more of my crochet projects?

Have you ever wanted to add a rustic wood button to your crochet or knit hats? You can make your own! See my tutorial here.
DIY Wood Buttons, Over The Apple Tree


I will be sharing with these great blogs!

Thinking about opening an Etsy shop?
Use this link and earn 40 free listings!


Follow me here:

Tuesday, October 27, 2015

Wood Button Tutorial

I love the look of wood buttons. After cutting down a bunch of branches from our tree out back, I wondered it I could make some myself. I did it and it was super easy. Here's how...

You can make your own wood buttons! DIY wood button tutorial, Over The Apple Tree

Find a nice round branch that is the diameter you want for your button. It can be with or without bark.
I used a hack saw to cut slices off the branch. Mine are about 1/8 inch thick.

You can make your own wood buttons! DIY wood button tutorial, Over The Apple Tree

Drill holes. I used a clamp to hold my button in place.

You can make your own wood buttons! DIY wood button tutorial, Over The Apple Tree

Sand your button. I used an electric sander and placed a piece of sandpaper underneath so it wouldn't slide all over the place.

You can make your own wood buttons! DIY wood button tutorial, Over The Apple Tree

You can finish your button any way you want. Some might want to stain them or leave them natural. I rubbed mine with a little vegetable oil!

Wood Button Tutorial by Over The Apple Tree

These wood buttons make the perfect embellishment for crochet goodies! I wonder what else I can make to stick these on. Coffee cozies will be available in my shop soon!

You can make your own wood buttons! DIY wood button tutorial, Over The Apple Tree

The pattern for this cute basket weave coffee cozy can be found on Ravelry by Alessandra Hayden

You can make your own wood buttons! DIY wood button tutorial, Over The Apple Tree


You can make your own wood buttons! DIY wood button tutorial, Over The Apple Tree

Thank you so much for visiting my blog!
Project Gallery

I will be sharing with these great blogs!


Follow me here:

Related Posts Plugin for WordPress, Blogger...